måndag 26 mars 2012

Spring is here


the red onions has moved out in the green house

This weekend was devoted to gardening. Saturday was spent at the country house where I raked my flower beds and borders giving little squeaks of joy every time I found a bulb or little plant that had survived the winter. I also made plans for my vegetable garden. This year I will grow three different salads, potatoes, onions, squash, beetroot and sugar snaps. Hopefully I will get some rhubarb, red currant and raspberries too.

I spent Sunday in the greenhouse replanting the sugar snaps and planting seeds for dahlias, beetroot and white Echinea. The sun was shining, the birds singing and the cats were hunting the first mosquitos.


...got it!!!!

I drank my afternoon tea in the green house enjoying the fact that now spring has really come to stay.   

Jeanette

fredag 23 mars 2012

The Friday Tutorial

Sock Bunny
My family suffers from the SdSE-syndrome. That’s the Spin-dryer Sock Eating syndrome for you who didn’t know. We are quite convinced that the fluff you find when you clean the spin-dryer in fact are not fluff but leftovers from the tiny munching little aliens that hides in your spin-dryer and lives of eating socks. They are picky little buggers though and never eats two of the same kind leaving you with lots of ill matched socks. This is when your glass is either half full or half empty. Since mine is usually half full I enjoy the fact that this opens up lot of opportunities for making sock bunnies.

I think there are just as many ways of making sock bunnies as there are socks but this is how I do it:


You need two socks, a scissor, needle and tread and some stuffing. I use wool but you can use pretty much anything you like.


Cut the foot of one of the socks right down the middle, but don’t cut all the way to the heel. This will make the ears.


Cut the other side of the sock down the middle. This will become the legs.


Cut the foot off the second sock and divide it in two by cutting it right down the middle. This will become the arms.


Turn the bunny body inside out and sew the ears and legs together. Leave a hole in the crotch for turning it right side out again and for stuffing.


Stuff the bunny’s body and legs. I usually don’t stuff the ears because I like them floppy. Many people use the “heel-side” of the sock for the face but I like to use the heel for making a bunny bottom instead. That way it sits much steadier. Fill the arms with stuffing too, not to tight. 


Use a tiny ball of stuffing and to shape the nose.


Sew the hole together.


Shape the neck and head by tying a ribbon around the neck. The sew the arms to the body just below the ribbon.


Then make the face. I used fabric markers but you can do some embroidery or have buttons for eyes if you like.


Tadah – done! Meet Sally the sock bunny !


Now I leave you for the weekend. Hope you have a creative one!
 Jeanette


torsdag 22 mars 2012

Joy

Oh the joy of growing plants from seeds! The miracle of it all amazes me every year. How you put this tiny, tiny little seed in a pot and after just a few days a plant appear. There is something so very vulnerable about these tiny little plants, they make my mother instincts appear. I speak gently to them and guard them like a hawk against my two very nosey cats.

This is the Isop and the sugar snaps I planted last Sunday.

Isop

Sugar snap


No sign of the onions yet though. I think I will go and talk to them...
Jeanette

onsdag 21 mars 2012

You may not believe this


While I visited the Yarn & Fabric show I did not only buy a lot of yarn but I also attended a half hour workshop of Amigurumi. Now anyone who knows me would probably not believe this due to the fact that I with great stubbornness swear to the fact that I can’t crochet. I hated it in school and could never get my kettle-holders nice and square. The mere thought of reading a pattern, increase or decrease made my head spin. But what do you know? Miracles do happen!
After the half hour work shop I had made a crocheted cup cake in bright pink and I was hooked. I bought two patterns and when I got home I started on the first one – a rabbit! Now I have two feet and a paw to go and then I am finished.


Oh you may laugh thinking that a cup cake or a rabbit is no biggie. Well maybe it isn’t for you but for me its right up the same shelf as changing tires, sew a zipper or repaper your living room. It might not be rocket science but I still say - Wooohooo way to go Jeanette!

Jeanette

tisdag 20 mars 2012

Tag Tuesday


This weeks theme in Tag Tuesday was GOOSEY – geese and ducks. That made me think of Jemima Puddle Duck from the tales by Beatrix Potter so Jemima it had to be.

Jeanette

måndag 19 mars 2012

New additions….or addictions…

I visited a Yarn & Fabric show this weekend. They had a lot of rubbish there but also some really lovely yarn. Naturally I had to buy some….


I bought this beautiful 1-tread wool yarn from Iceland in the most amazing colors. The yarn was quite addictive. The green is for a sweater and the bright pink and red for a shawl. Don’t know what I will use the orange for yet but it will come to me in the end.


Then I found these gigantic “must have” buttons. I might have about a zillion buttons but nothing g like these. They will brighten up many a garment in my only too black wardrobe.


I also bought a ball of Noro yarn for a spider web thin Citron and….


.....a yarn made of recycled saris. Have yet to figure out what I want to use it for but that is part of the fun….


Now I need to rearrange my workroom to get it all in.
Jeanette


fredag 16 mars 2012

The Friday tutorial

Playing with food

Did your mum tell you not to play with your food as a kid? Well here is your revenge. Who could have known that the celery stem looked like the perfect image of a rose? and that you can use it as a stamp? I didn’t anyway. I got the tip and a tutorial in this magazine.


Bonnier 101 Ideér Nr 1 2012

They used celery to stamp on paper but I went for fabric instead. I really had a lot of fun and like to chare it with you all. Here is how I did it:

You need: fabric, fabric paint, a brush and celery.


Cut the stem off the celery.


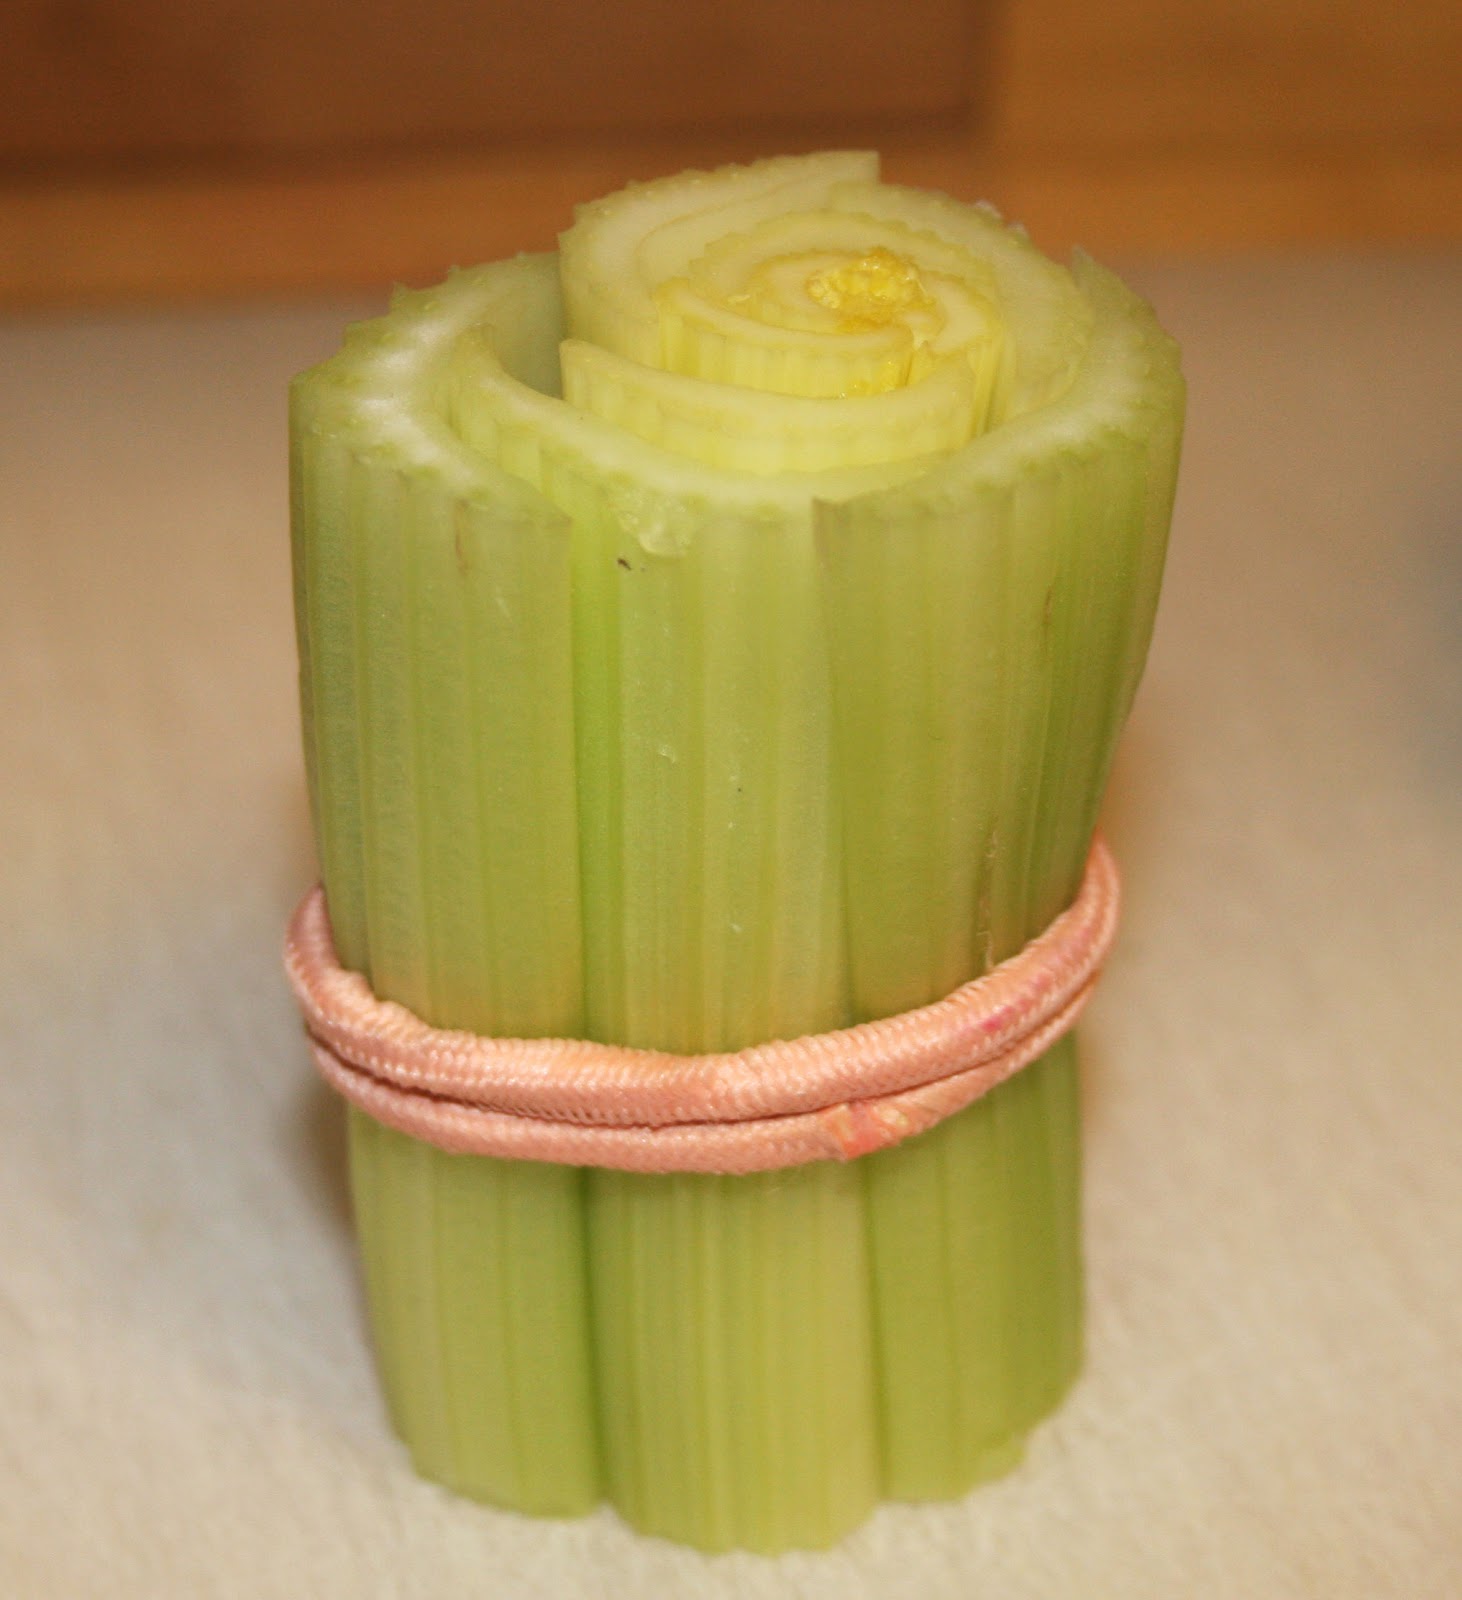
I wanted both a big and a small rose so I cut one piece quite near the end and one piece higher up. The smaller piece didn’t hold together so I secured it with a rubber band.


Add paint to the celery using a brush. Now doesn’t that look exactly like a rose? Amazing!


Start stamping!

I didn’t get as clear an image as I thought I would. I think it’s because my celery had spent a while in the refrigerator and was a bit soft. It would probably have worked a lot better with a really fresh one.


I ended up making a “spring lady” . She looks like she is wearing gigantic Carmen curlers more than roses but what the heck. I think I will use it for a pillow cover.


Well, I knew it as a kid and I know it now – playing with your food is fun!


Now I leave you for the weekend. I hope you have a creative one!

Jeanette