måndag 30 januari 2012

Sick leave


I am on sick leave. Hope to be back by the end of the week!

See you all soon
Jeanette

fredag 27 januari 2012

The Friday Tutorial

A birthday keepsake from a tin of mackerel


I don’t just collect buttons, yarn, fabric, paper and lace. I collect tin cans too. Today I wanted to make a keepsake for a very special little birthday girl. I went through my collection and found the perfect one – a mackerel tin. Do you want to make one too? Ok here goes.


You need: A mackerel tin or any other tiny tin of your choice. You also need paper in bright colors, a photo, pearls, wire, glue, an awl and a pair of scissors.


Start by making a tiny hole in the top and bottom of the tin using the awl. This is important believe me…I´ve learnt the hard way you see finishing the whole piece just to notice that I forgot to make a hole for the wire hanger.

Cut out a background and a border in paper. Cut out the photo. Glue the background to the tin.


I also drew a pair of butterfly wings and painted them with ink. I added a touch of color to the little girls dress too.

Then I made a little wrapped gift to put in the tin. I used a sugar lump in case she would open it and eat it.


Now tread a piece of wire through the hole on the top, make a loop and secure it with a pearl. Use the hole at the bottom of the tin for hanging a tiny embellishment. I made a string of tiny pearls. It is best to do this before you start adding stuff inside the tin. Otherwise it gets difficult to maneuver. Yep, I learnt that the hard way too….


Finally you glue everything in place. You glue the wings on the back and the photo inside and finish with the border. Then I added the little gift. I never glue the photo directly to the wall, instead I glue the “feet” of the little girl to the bottom of the tin. That creates a sort of 3D effect.

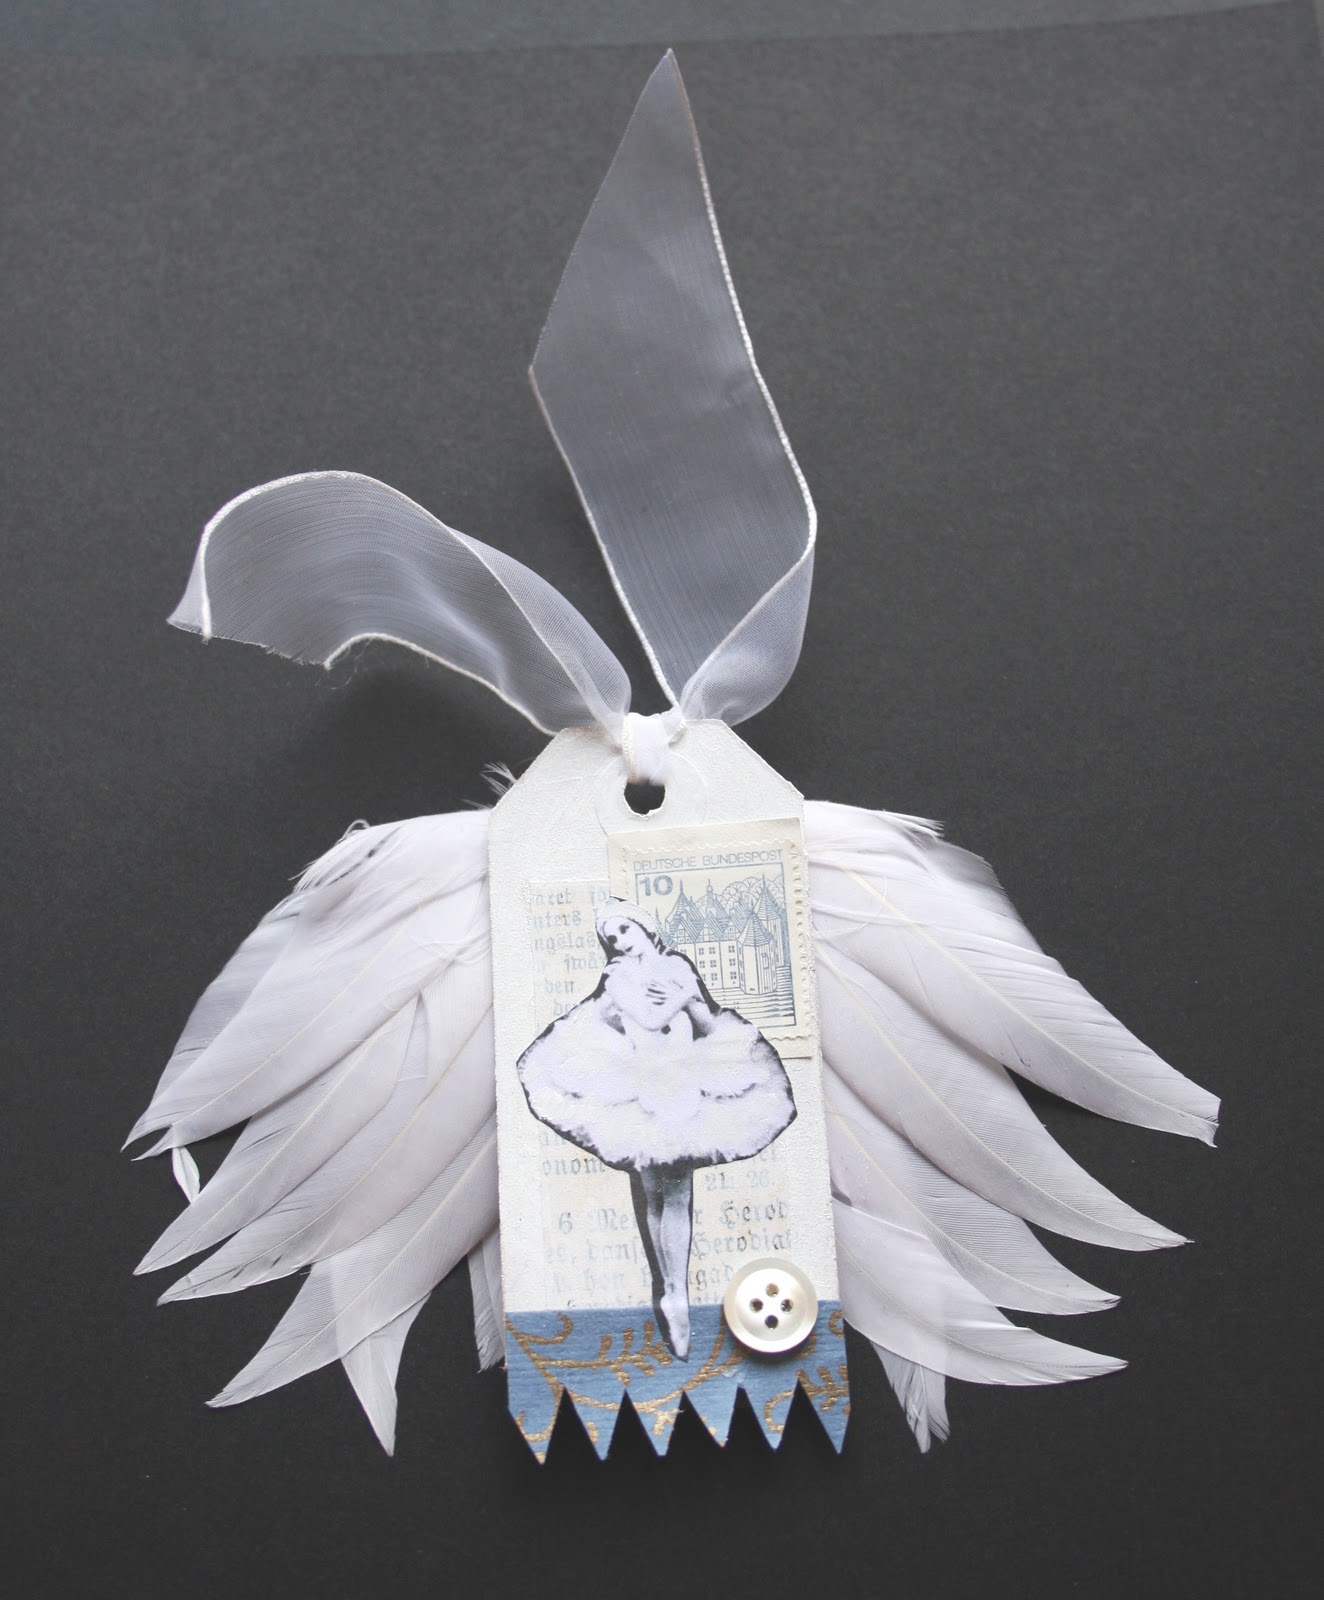
This is another one I made a year ago. Also for a birthday girl! Not from a tin though but you can get a better picture of the 3D effect here.


Now I leave you for the weekend. Hope you have a creative one.

Jeanette

torsdag 26 januari 2012

Sneak peak

I am working on my leaf for the exhibition. I go from joy to despair. One minute I am SO content with the result and the next minute I hate it! Recently I learnt that there will be two exhibitions, first one in Malmö showing the leaves from the south Swedish crafters and then a second exhibition in Stockholm (the big one!!) where the 2000 leaves from all over Sweden are shown. Now this doesn’t lower the pressure I am starting to feel one bit! Not many weeks left now before the deadline either.

First I meant to do a wet felted piece. I even started on it…..Then I decided that I wanted a different feel to it all together. My leaf is a combination of metal craft, paper mache, wood carving, decoupage and some embroidery. One can say that it’s a mixture of the things I like to do the most…

Here is a sneak peak…..


Take care

Jeanette

onsdag 25 januari 2012

Bits and pieces


They look so sweet when they are asleep but when they are awake….oh my…. They chase each other all over the house.


So not much creative work done today. Have to mend stuff after my cats’ latest mischief instead.


Thank god for superglue!
Jeanette

tisdag 24 januari 2012

Tag Tuesday


Vintage was his week’s theme. For me vintage means something old with a soul. So an aged item isn’t always considered vintage by me. I have to feel that it has a soul too, which speaks to me in some way. I love antique shops, jumble sales and thrift stores and visit them often but I much rather leave with a piece of china that has a crack in it than something in mint condition.


I kept my tag really simple this week and named it “ A vintage soul”. The paper on the background is from a 120 year old book, a jumble sale find ( with a soul...) and the angel is a photo taken by me at an old graveyard here in my hometown. I finished by adding my January blue border.

Jeanette

måndag 23 januari 2012

Patience


I am not a patient woman. Passion YES but patience - no I haven’t got a lot of that. This makes me a woman who does things fast, who is no good at waiting and more often than not acts before having actually thought things true. But, and this is important I am NOT rude or impatient with people who doesn’t do things quite at my speed – I just tend to chose doing most things myself!

I want to see a result fast and I think that’s why I take photos instead of paint pictures, do wet felting instead of quilts, embroidery instead of weaving and almost never knit with a thin yarn…..and it’s why I don’t do leaven bread! Just the mere thought of having to wait for the bread to rise for days on end makes me itch all over.

The not being patient thing is also why I don’t do gardens or at least didn’t until quite recently. Gardening is all about patience. You plan, you plant and then you do what? Yes you WAIT!

My gardening used to consist of frequent trips to the nursery where I bought all the plants I could lay my hands on, planted them and then forgot all about them. I got a fast result that’s true but it never lasted for long. Nowadays I really try to fight the urge to do “a quick fix” when it comes to gardening.


If someone had said a few years back that I would own a green house, grow my own plants from seeds and have vegetable garden I would have laughed out loud. But what do you know, things can change. Who knows I might start to doing quilts next….or not!

Jeanette

fredag 20 januari 2012

The Friday Tutorial

Recycled shawl
I have enough cowls and shawls to last me a lifetime but still can’t stop making them. It is easy and fun and I can do it while watching TV. If I pass a shawl on a jumble sale I try to will myself to walk past it but usually end up buying it anyway. If it is a 100 % nature materials that is, no synthetic stuff for me. I often pimp the ones I buy at jumble sales so here is a tutorial on how to do it - fast and easy!

You need: An old shawl made of 100 % wool, maybe one you have knitted yourself ages ago and never wore or one you bought at the jumble sale last winter (....and never wore). You also need some merino wool.

Spread your shawl out on a synthetic piece of fabric. Make a nice pattern using your wool. I went for a flower pattern using merino wool.


Sprinkle hot soap water over the shawl and “fasten” the wool by using circular movements with your hands.


Roll the shawl and the fabric together and secure it with strings in a few places.
Throw it in the spin dryer for between 3-10 minutes. Check it out often by unrolling it and see if the wool has stuck to the shawl. If you let it stay in the spin dryer for too long you risk having made a kettle holder instead. Nothing wrong with kettle holders I collect them too....but maybe not the item you where going for this time.


Tadah! Done! Now you can embellish it with some embroidery if you like!


Now I leave you for the weekend. Hope you have a creative one!
Jeanette


torsdag 19 januari 2012

Friday tomorrow

Yep, thats me! I am four I think.
I have not always been into crafts but I’ve always had a need to express myself in some way or other. In my teens it was mostly through music or writing. I sang in different choirs, wrote poems, short stories and in letters-to-editor columns. For many years I dreamt of being a journalist until a terrible high school teacher put an end to my dreams by only focusing on the fact that I didn’t know my grammar well enough.

I don’t really know when my crafting started or how. Oh I knitted the odd sweater in the 80: ies and did some embroidery too and I even gave sewing my own clothes a try but I never really got hooked. Thinking back on it now I can’t really understand what I filled my time with before felting, metal craft and recycled stuff entered my life. It could have something to do with my kids being older and the fact that I actually have spare time nowadays I guess.....

Maybe it isn’t all that interesting when it started but more importantly that it did. Without my crafting I would never have entered the world of Blogs nor had exhibitions – a whole new world opened up and has given me so much. My head is constantly spinning with ideas and the joy of working with an idea from start to finish and realizing that it turned out well is enormously inspiring. It`s even fun when they don`t turn out so well. That can give you a laugh or two for sure!
 
I believe that everyone can be creative and that everyone has a talent. It’s just that for some – like it was for me - it`s hidden and yet to be explored.Thats why I started with my Friday tutorials hoping to inspire some of you to give my DIY a try and find that inner creative person that I am sure you are!
 
See you all tomorrow!
Jeanette

onsdag 18 januari 2012

Which is wich?

I am planning to do a series of embroideries a bit like these I made last spring. Back then I colored some of the linen fabric with tea and I also “painted” the paper I used with strong tea.


I am going for a similar color scheme this time too but wanted a bit more variation so I decided to try coffee as well.


Here is the finished result. Have a guess? Which is which?


The one above is tea and the one below is colored with coffee. The result had me surprised. I was dead sure that I would get a darker color from the coffee not the other way around. Now I can’t wait to get started on the embroidery.

Jeanette

tisdag 17 januari 2012

Tag Tuesday

White
 This weeks theme for Tag Tuesday was white.
When I thought about winter and the color white I got this image in my head of swans on ice. Lying there almost invisible with just the color of their beaks giving them away. The tag is created from that image of swans but was transformed into feathered wings and Anna Pavlova dancing the dying swan. I made a blue border like on last weeks tag. It will be my own “theme” for my January tags.


Loved making this one!


Jeanette

måndag 16 januari 2012

Watch duty & wood carving


My husband had to mend the tiles on the barn roof on Saturday and I was assigned to watch duty in case he fell down. That was about as exciting as watching white paint dry but luckily I had my carving knife with me and after I found a few birch branches in the wood pile I had much more fun. With one eye on my husband and one on the carving knife I happily carved and carved. I used the branch “as it was” meaning that I tried to see what it resembled and then carved after the image I had in my head.


When my husband was finished I had three little figures. A bunny,


 a
party fox


and a rabbit with moveable arms and legs.


When I got home I gave them a stroke of paint with a little help from a friend….


Wood carving turned out to be a good cure against boredom!

Jeanette

fredag 13 januari 2012

The Friday Tutorial

A garden cloche

Although it is only the beginning of January I have started planning for the gardening season. I collected a lot of seeds from flowers last summer and I can hardly wait to get started with the planting. I have a green house in my garden but have been thinking about getting a garden cloche or two for protection of tiny plants outdoors.

There are numerous benefits had by using a cloche. They shelter the plants from frost and strong winds and it warms the soil and encourages early germination. They also keep insects away and hopefully the field rabbits (real pests) too. I like a glass cloche best mostly because it is beautiful glittering in the sun but also because you can use them indoors to display your special items. They are rather expensive though…..

So where am I going with this gardening lesson you might wonder. Well I thought I would give you a tutorial on how to make a cloche of glass on your own and dead cheap too.

Sorry about the photo quality but made it in the evening and had to use a flash.

You need: a vase or a glass jar, a glass (wineglass, desert cup) that is big enough to fit the bottom of the vase, strong two component glue and some tape for securing the glasses when you have glued them together.


Wash the glasses and make sure they are completely dry. Mix the glue and add a thin layer on the bottom of the vase and the rim of the glass. Place the glass on top of the bottom of the vase, press together and secure with tape.


Wait until the glue has hardened and tadah - a glass cloche!


I will have to wait a while longer for plants but why not use it fore something else in the meantime.


Now I leave you for the weekend. Hope you have a creative one!
Jeanette

PS If you want to make an even cheaper one just cut off the bottom of a plastic coke bottle and you are done! Not that beautiful though!

torsdag 12 januari 2012

UFO

I have a really short attention span. I start on so many things with great plans of getting them finished but then something more fun comes along ….a new idea….and I just have to try that out instead.

Do you remember these?


They just lack some embroidery and then they would be finished.


Or this?


I got as far as one coat of white paint and then I grew tired of it.


Or my brown linen tunic…..so very boring now!


Or the skirt I started making using a jumble sale finding, a 70: ies pillow cover. Not nearly finished.


…and last but not least - these! I feel ashamed to tell you but I haven’t made that second sock yet. And how I bragged about wanting to knit only socks in the future... until an intriguing pattern for a cabled cowl came along.....


In the past I have tried to be very hard on myself telling me that I can’t buy any new yarn or start on anything new before I have finished what I have already started. But it never worked! I cheated, using yarn that I had already got telling myself that it was okay. Yep, I am a basketcase!

Nowadays I`ve stopped punishing myself thinking that it will probably turn out okay in the end anyway. I will bury my UFO:s in a big basket and if just enough time passes until I find them again  I will look upon them with renewed interest and probably ditch something else to continue with the UFO:s instead. Pretty smart huh?


Jeanette


onsdag 11 januari 2012

A new family member


Both my daughters started riding at the age of six. I am not a “horseperson” myself and was somewhat taken aback by their choice of sports. I never became a pony mum and my opinion of horses is still that they are mostly unreliable, with sharp teeth in the front and kicking hoofs at the back. I was always afraid when I watched them riding especially show jumping and my anxiety didn’t decrease by the fact that my eldest daughter always seemed to like the difficult horses best.  

My youngest stopped riding at the age of 15 ( thank god) but my eldest kept on and chose a high school (boarding school) where she could continue developing her riding skills. The last two years in school she even rented a horse full time. He was sweet as sugar as long as you didn’t ride him but I spent more time than I care to remember at emergency rooms and doctors. Ever since she graduated and had to return her horse she has been on about buying one of her own and now she has.

This weekend we welcomed the new family member – Elite Moonshine. He is 8 years old, a trotter with both a famous dad and granddad ( Mack Lobell) but has never entered a trotting race himself.


Do you know what? I think I am in love. He is sweet, calm and very reliable and when I watched my daughter ride him I felt calm for the fist time in many years. I actually helped out with the grooming, well I didn’t pick the hoofs….I don’t have that strong a death wish…but I did everything else. I even brushed his tail.


I think he likes me too. Could have something to do with the amounts of carrots I am bribing him with….

But I draw the line at stable duty though and I will never ever ride myself! I prefer having my feet firmly on the ground!

Jeanette

PS Needless to say I didn’t do a lot of knitting or other creative stuff this weekend. I just finished a crocheted border on one of my knitted shawls. Promise to show it to you another day.